Mantel Installation
General Tools and Materials
Click Here to Download a Printable PDF Version-
 Mollies/Anchors
-
 Deck Screws
-
 Screw Gun / Drill Driver & Bits
-
 Caulk Gun
-
 Color Complimenting Textured Caulk
-
 Loctite® PL® Premium® 3X Construction Adhesive
-
 Level / Laser
-
 Tape Measure
-
 Safety Glasses
-
 Pencil
-
 Touchup Kit
-
 Cotton Swabs
-
 Clean Cloth
-
 Small Paint Brush
-
 Stud Finder
-
 Cut Lumber
-
 Wood Cutting Saw with Finish Blade
-
 Mantel Mounting Strip
- Ensure surface is structurally sound and in good condition. Surfaces such as drywall should be flat and smooth to minimize gaps.
- Acclimate all materials by storing them flat in the installation location (but away from moisture and direct sunlight or other heat sources) for at least 24 hours.
- Gather all tools and materials.
- Be sure to obey all safety rules and recommendations set forth by tool manufacturers.
- Always follow any, and all, local, state, and federal building codes.
- Always comply with clearances set forth by the manufacturer of stoves, fireplaces, furnaces, and any other heat source.
- Our faux mantels are durable, but are for decorative use only. Mantels are not intended to support heavy weight.
- Wear safety glasses during the entire installation process.
- Our products may have screws embedded below the surface. We recommend using a hand saw (not power tools) when cutting these products. You may find these screws with a stud finder. Barron Designs is not responsible for any bodily harm or damage to your equipment.
Click Here for Care and Maintenance info.
Directions
Step 1
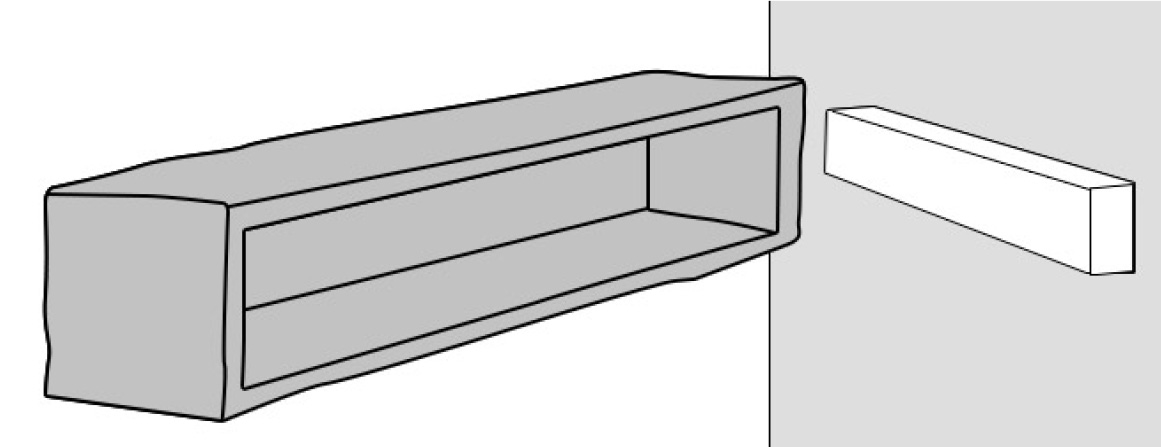
Measure the Inside Dimensions of the Mantel
Tools:
- Tape Measure
Skip to Step 3 if you purchased a mounting strip along with your mantel.
Turn mantel over on a soft, clean surface and measure the interior dimensions.
Step 2
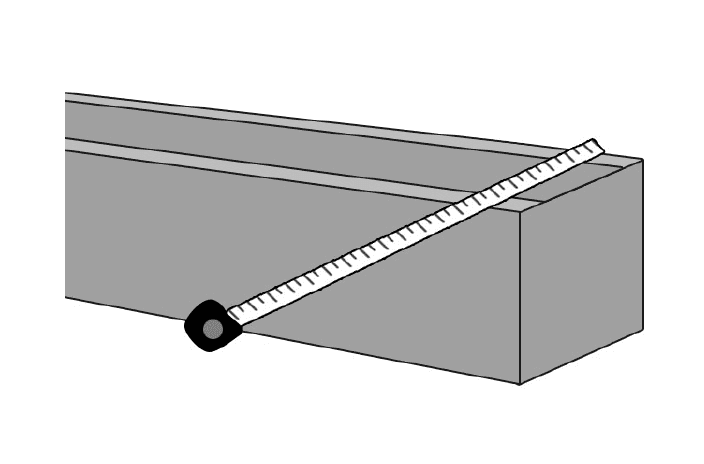
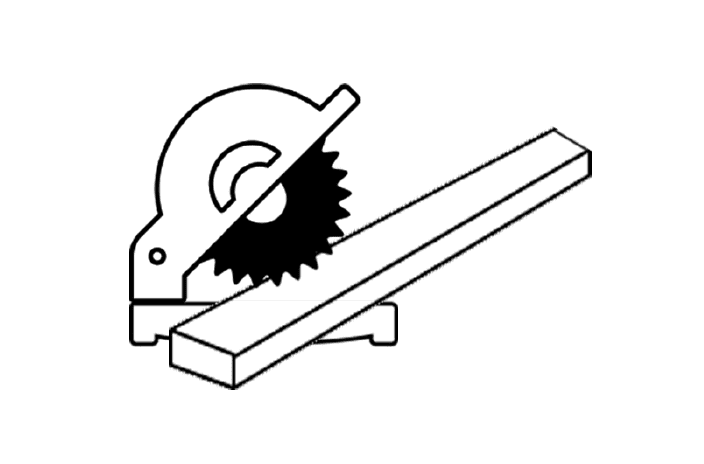
Cut Lumber to Fit
Tools:
- Lumber
- Wood Cutting Saw with Finish Blade
- Cut and/or rip the lumber so that it fits inside the mantel with at least 1/8” clearance.
- Dry fit the cut lumber inside the mantel to be sure that it does not have to be forced.
NOTE: For deep mantels we recommend stacking two pieces of lumber to create the mounting block.
Step 3
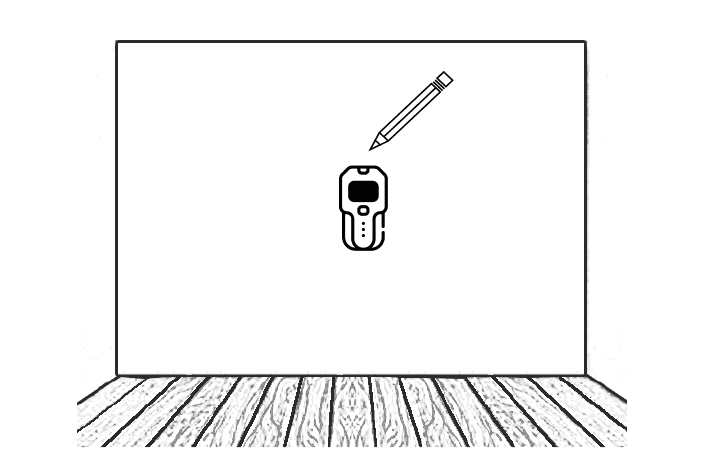
Locate Studs
Tools:
- Stud Finder
- Pencil
Using a stud finder mark each location with a pencil.
Step 4
Level and Secure Lumber
Tools:
- Pencil
- Laser/Level
- Screw Gun/Drill Driver
- Mollies/Anchors
- Deck Screws
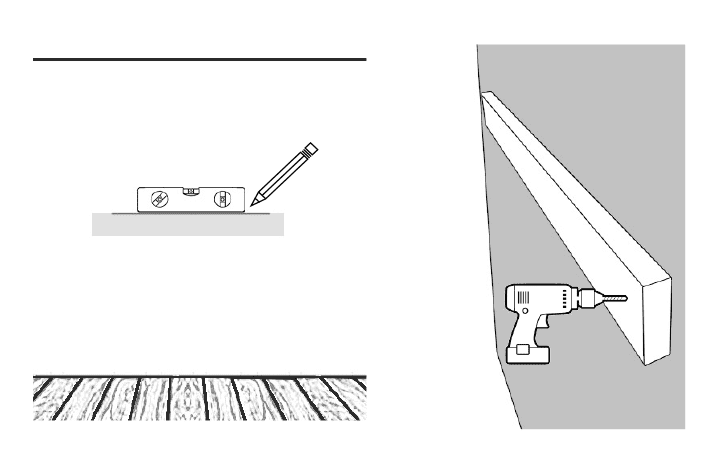
- Create a level line one inch below where you want the top of the installed mantel.
- Attach the lumber to the wall at the level line by screwing the deck screws through the lumber and into the studs. Use mollies/anchors if there are no studs.
Step 5
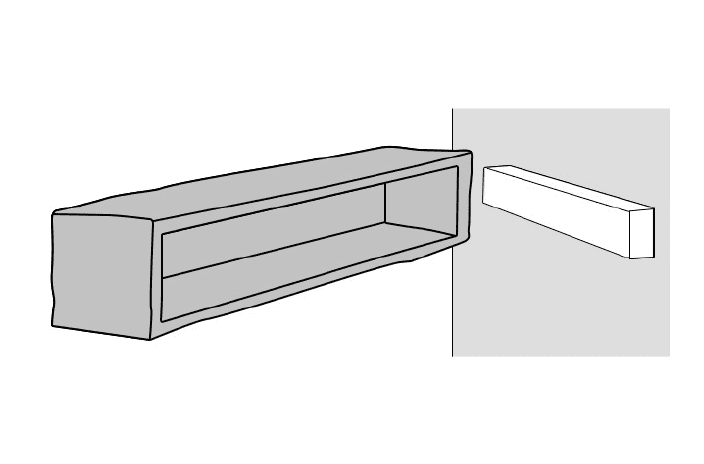
Dry Fit Mantel
Before securing the mantel make sure it fits over the cut lumber.
Step 6
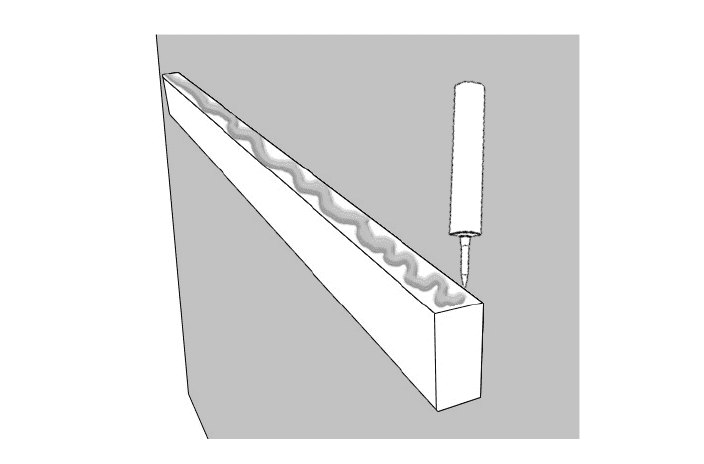
Apply Adhesive
Tools:
- Loctite® PL®Premium® 3X Construction Adhesive
- Caulk Gun
Apply Loctite PL Premium Advanced 3X Construction Adhesive to the top of the mounted lumber.
Step 7
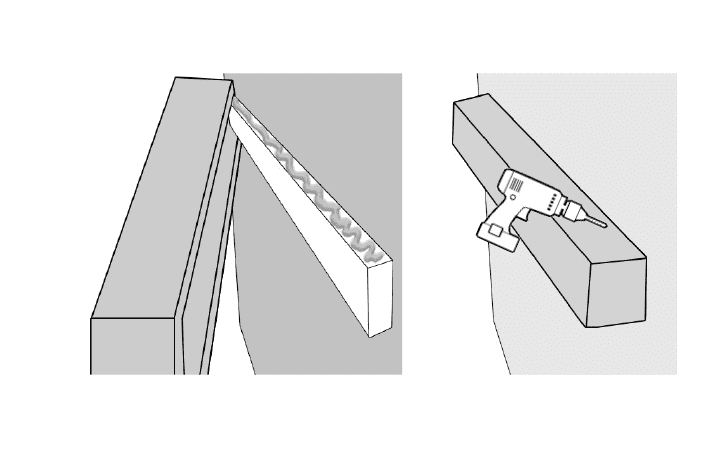
Install & Secure Mantel
Tools:
- Screw Gun/Drill Driver
- Deck Screws
- Slide the mantel over the mounted lumber.
- At the top of the mantel, use the deck screws and toe screw the mantel to the lumber. Recess the screws about 1/8”. Be careful not to over tighten.

Step 8
Touch Up
Tools:
- Painters Tape
- Clean Cloth
- Caulk
- Caulk Gun
- Touch-Up Kit
- Small Paint Brush
- Apply color complimenting textured caulk to fill screw holes. Blend caulk into adjacent surfaces while it is still wet.
- Use paint from the touch-up kit to paint over the caulk.