
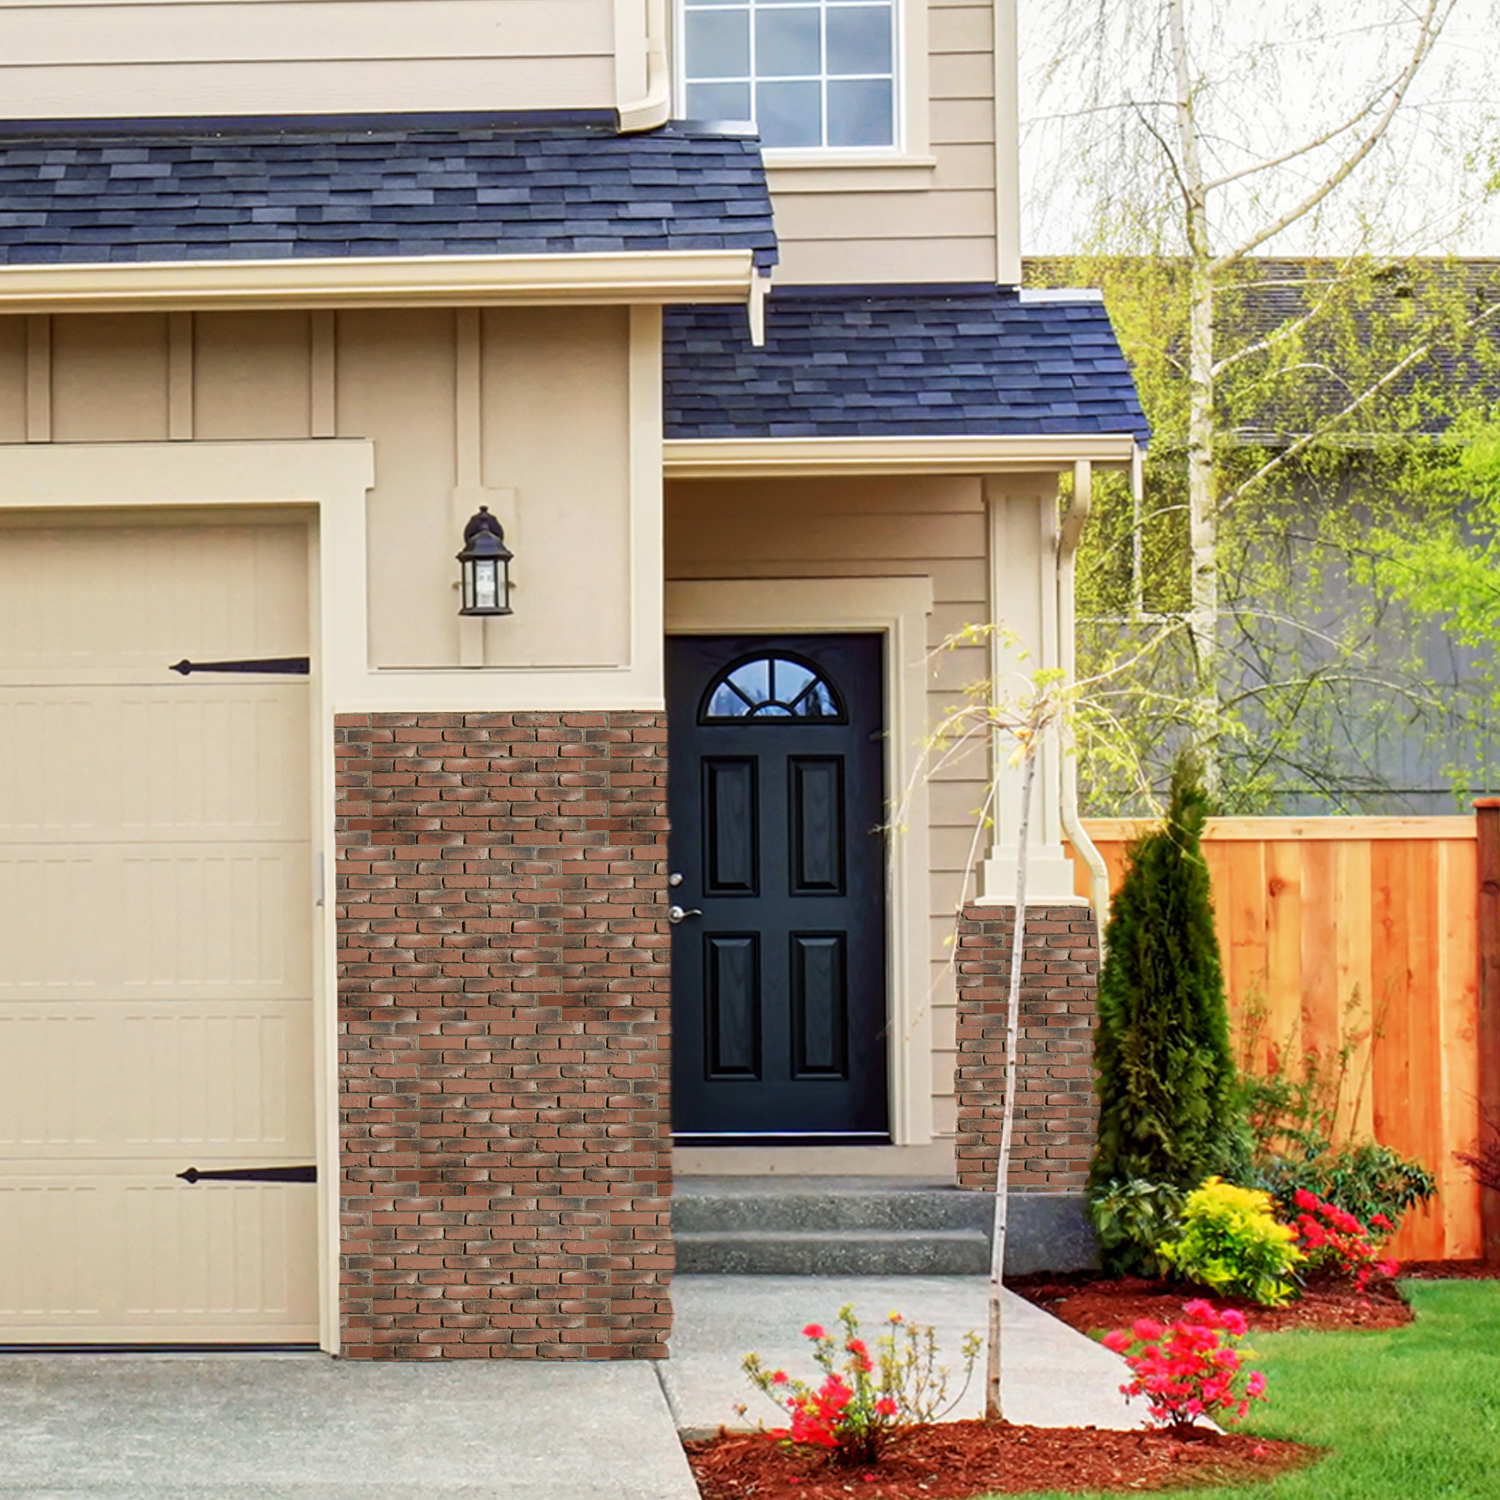
Faux brick panels are much cheaper than real bricks and far easier to install. Not only can they add visual interest to indoor spaces, but they can also be used on the exterior of your home to boost curb appeal.
For example, exterior faux brick panels may be used to imitate the look of a brick wall or installed as siding on your home. Here, we’ll describe how to choose the right faux brick wall panel and go over the basics of installing faux brick panels on an exterior.
Installing Exterior Faux Brick Panels: What You Need to Get Started
To install faux brick wall panels on an exterior, gather the following tools and materials:
- Enough faux panels to cover the area
- Caulk gun
- Chalk line/laser
- Clean cloth
- Color-coordinating textured caulk
- Cotton Swabs
- Level
- Loctite® PL® 3X Premium Construction adhesive
- Panels
- Pencil
- Safety glasses
- Small paint brush
- T-Square
- Tack cloth
- Tape measure
- Touchup kit
- Water
- Wire brush
- Wood cutting saw with finish blade
Note: (1) tube of Loctite® PL® 3X Premium Construction Adhesive is typically needed for every (3) panels. (1) tube of textured caulk is typically needed for every (4) panels.
Adhesive and Fastener Installation
- Deck screws
- Drainage mat
- Screw gun/drill driver and driver bits
Adhesive-Only Installation Over Concrete/Masonry/Metal
- Disposable gloves
- Great Stuff applicator gun
- Great Stuff pro gun cleaner
- Great Stuff Pro Construction Adhesive
How To Install Exterior Faux Brick Panels

Exterior faux brick panels are easy to install. We’ll share the basic steps below to give you an idea of the process. When you’re ready to install your panels, you can see detailed diagrams to support the steps we outline below. Just click here for our full Installation guide.
Before you get started, evaluate the structural integrity of the installation site, prepare the workspace and installation surface, gather the required tools, and organize the site for optimal workflow. Be sure to follow all applicable building codes.
And finally, be sure to allow enough time to acclimate new faux panels per the manufacturer’s recommended guidelines before installation. Here is an installation day summary:
Step 1: Orient The Panels
Brick faux panels will be installed from right to left. Orient the panels so that the flat lip is up and the fingers are pointing to the right.

Step 2: Prepare Installation Surfaces
Thoroughly clean the wall to ensure solid and lasting adhesion. Wipe the back of the panels with a tack cloth to remove any dust or dirt.

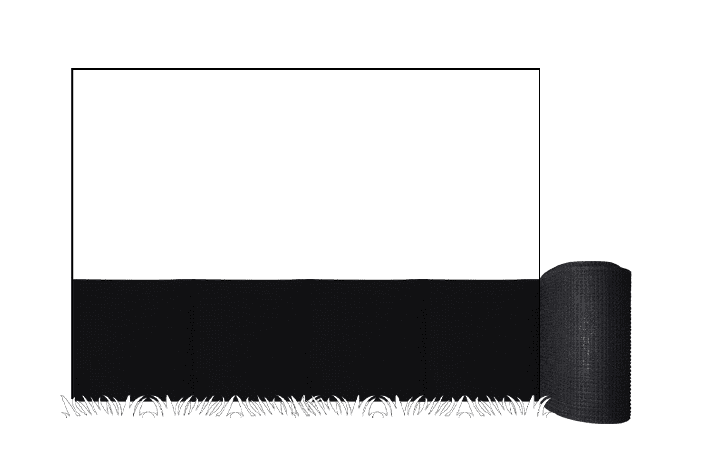
Step 3: Install Drainage Mat
Install a drainage mat according to local building codes. Be sure that the grid side of the mat is against the structure and that the flat side faces out.
Step 4: Trim Your First Panel
Next, you’ll want to trim your first panel. If you will have to navigate corners as part of your installation please refer to the corner installation guide.
Measure and mark the panel for at least 12" from the right side of the panel for your first cut. Use a wood-cutting saw with a finish blade to cut the panel. Save the remainder of the panel for use later in the project.

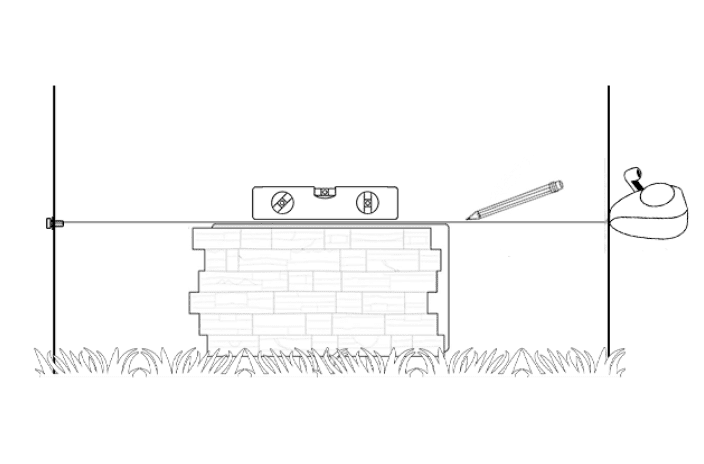
Step 5: Draw A Level Line
Establish your highest point of the first row and draw a level line along the length of the wall.
Step 6: Apply Adhesive
Clean the back of the panel with a tack cloth, then either follow the adhesive-only application or the adhesive and fastener application depending on your installation method.

Step 7: Affix The Panel
Align the top of the panel with your level line, and with a healthy amount of pressure and a slight twisting motion, stick the panel to the wall.

Step 8: Reinforce With Screws
If you are using the adhesive-only method, skip this step.
If using the adhesive and fastener method, once your first panel is glued to the wall, reinforce it with screws. Apply one screw per square foot around the perimeter of each panel and through the middle of the panel. It is best to add the screws between bricks where they can be easily hidden.

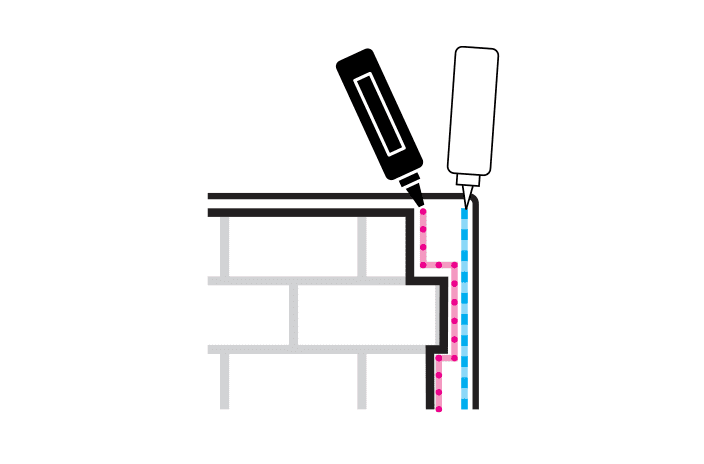
Step 9: Apply Adhesive And Textured Caulk To Prepare For The Next Panel
Our panels interlock, making seams virtually disappear. Apply a bead of adhesive along the slot and a bead of textured caulk where the two panels come together to ensure a watertight fit.
Now you’re ready to install the next panel. Make sure your panels stay level throughout the process.
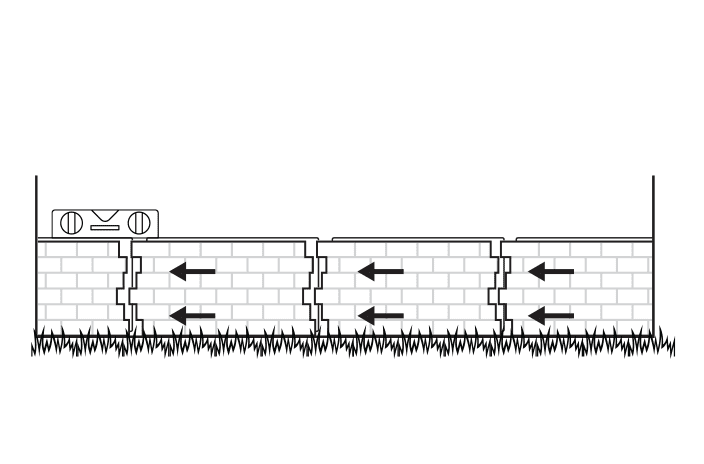
Step 10: Repeat Steps 7-10 To Complete The First Row
Be sure to butt the panels tightly together while following your level line. Dry fit each panel before applying adhesive to ensure it fits flush. Trim if necessary. The last panel on the row will have to be trimmed from the finger side of the panel. Wipe off any excess caulk or adhesive with a damp cloth before it dries.
Step 11: Start The Next Row
Trim the right side of the first panel on the next row at a different width than you trimmed the lower row so that the panel seams offset as you go up the wall. This will produce a staggered, and more visually appealing, seam from row to row.
Apply adhesive to the top lip of the panel below, offset the seams, and start your next row directly above the first panel. From there, you can repeat the process until the installation is complete.

Step 12: Touch-Up As Needed
Apply textured caulk to fill in any gaps, holes, or joints. Use a small paintbrush to carefully blend the caulk before it dries.
Use your touch-up kit to blend the caulk and cover any blemishes. Your touch-up kit will likely contain a base coat, tint, and wash. If your touch-up kit includes a base coat, apply a light layer, first, with a cotton swab. Allow this coat to dry completely. Then, apply the tint using a small paintbrush. Finally, if you have a wash, apply the wash using a paintbrush and then blend it with a soft cloth.

Additional Tips For Installing Exterior Brick Veneer
These tips can help you make sure your brick veneer siding project goes as smoothly as possible:
- Ground is seldom perfectly flat – find the high and low spots and plan accordingly
- Install late fall or early winter (before the ground starts to freeze)
- Keep panels out of direct sunlight before installation
- Store your panels flat to avoid warping
- Use high-quality materials – they’ll look better and last longer
- Measure twice, and cut once
How to Choose the Right Faux Brick Wall Panel
When you make an update to your home’s exterior, you want it to last. There are several brick wall panel options available, but they’re not all created equal. Be sure to do your homework before making a purchase. Before you buy faux brick wall panels, consider the following:
- Quality
- Durability
- Color/how natural the panels look
- Ease of installation
- Maintenance required
- Price
Choosing a quality brick wall panel not only makes for more professional, natural-looking results, it saves you from time-consuming maintenance and expensive repairs down the road. And, by purchasing faux brick wall panels that are DIY friendly, your project becomes even more affordable.
AZ Faux offers three faux brick panel styles and twelve different finishes that give your home’s exterior the same look and feel as a brick home, without the expense. Our brick veneer panels are easy to install yourself, require little to no maintenance, and are made to withstand outdoor elements like harsh sunlight, moisture, and extreme temperatures.
Below are the three faux brick panel styles we offer.
Old Medford Faux Brick Panel
If you’re looking to add faux brick to the front of your house or create an eye-catching accent wall, Old Medford Faux Brick Wall Panels provide a classic old-world look.
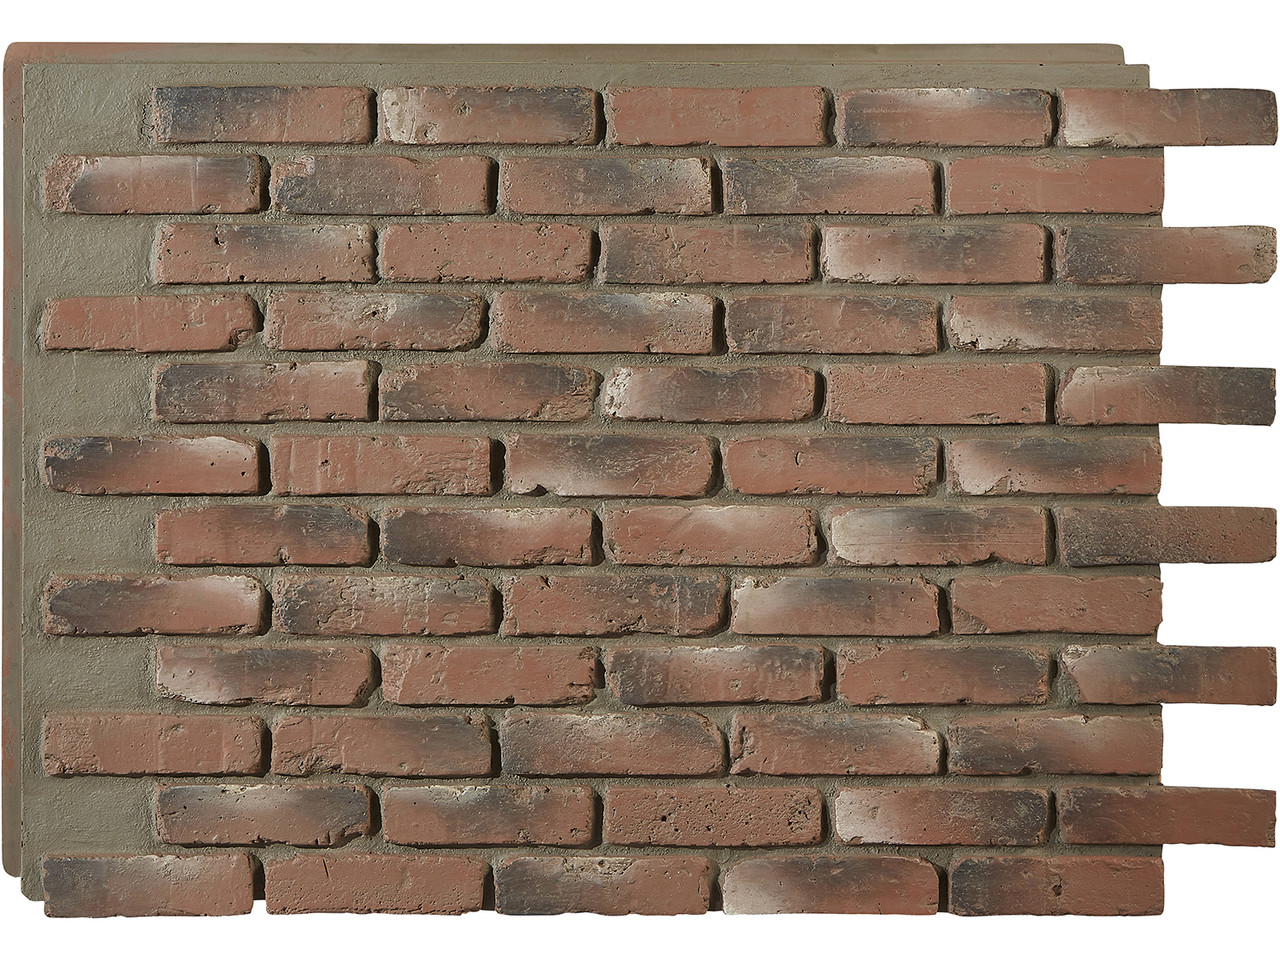 Old Medford Faux Brick Panel in Historic Brick
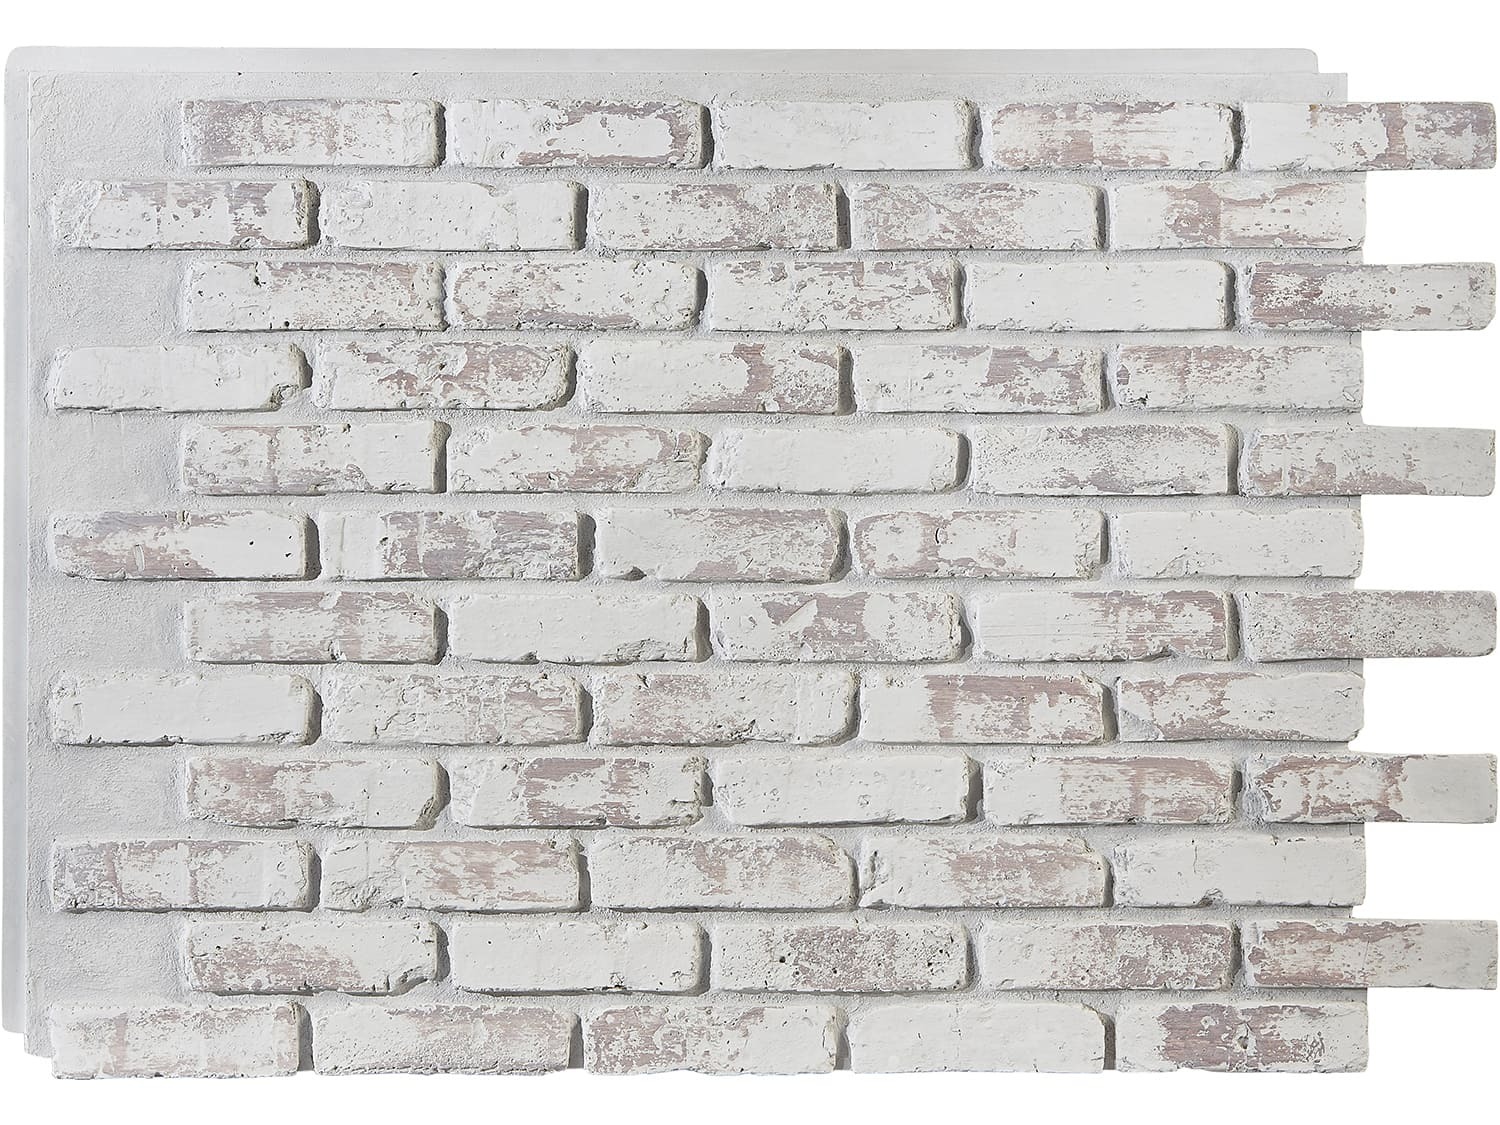 Rustic Faux Brick Panel in Washed Brick
Rustic Faux Brick Panel
Available in six realistic colors, Rustic Faux Brick Wall Panels are perfect for reviving home exteriors, outdoor dining areas, front porches, and more.
Contemporary Faux Brick Panel
For a clean, modern look, choose Contemporary Faux Brick Wall Panels. This style is available in four attractive colors that add a modern flair to any home’s exterior.
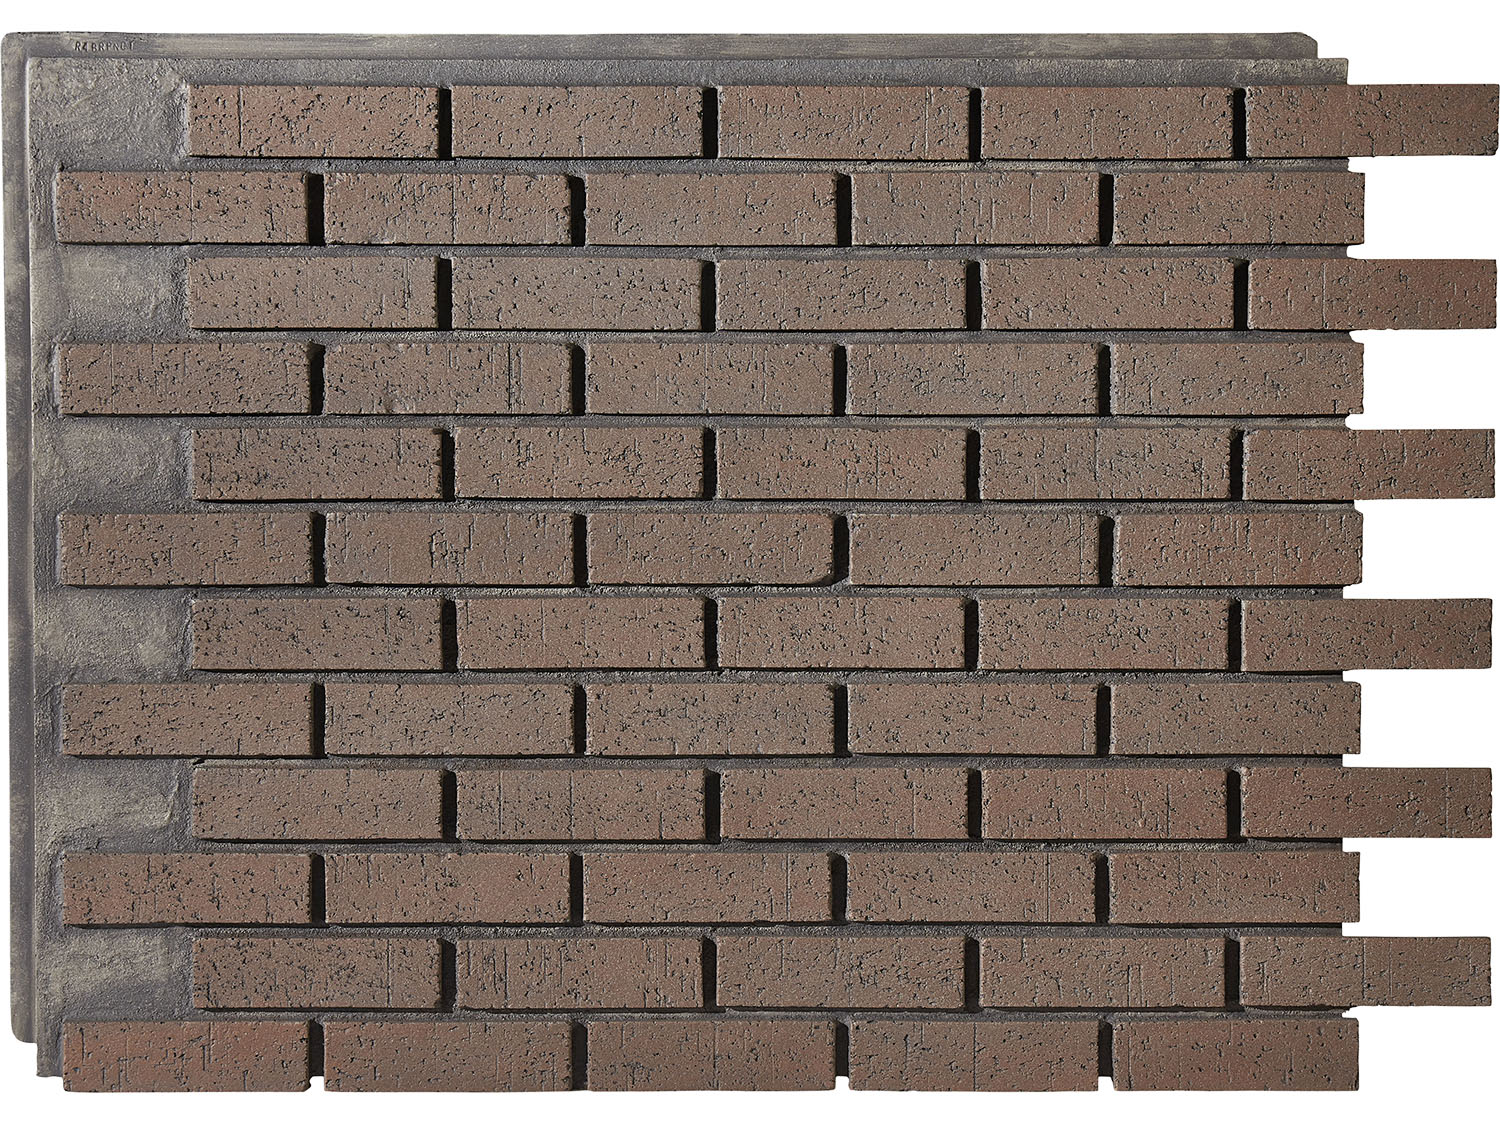 Contemporary Faux Brick Panel in Blush Currant
Frequently Asked Questions About Faux Brick Panels
Can you hang art on the faux brick wall?
Yes, you can, but keep in mind that faux brick panels do not support heavy loads.
How do you seal a faux brick wall?
Installing a faux brick wall with AZ Faux panels is easy and DIY friendly. Installation does not require any special skills and does not need to be sealed.
Does faux brick look real?
Our collection of faux brick panels is designed to look and feel like real brick. Each panel is cast from a mold of real brick, and then hand-painted by skilled artisans. To the eye, our faux brick panels are indistinguishable from the real thing.
Do the faux panels snap together?
AZ Faux brick panels are designed to seamlessly interlock with one another. During installation, be sure to butt each panel up to the next to ensure a tight fit.
Transform Your Home’s Exterior With Faux Brick Panels
If your home’s exterior, covered patio, or outdoor living area needs an upgrade, consider using faux brick panels. Unlike real brick, faux brick is affordable, easy to install, and requires little to no maintenance. When you choose faux brick, you won’t sacrifice looks – our panels are designed to have the same look and texture as the real thing!
With high-quality faux brick panels and a precise installation process, you’ll have a beautiful exterior brick veneer that will add aesthetic appeal and value to your home.