Suspended Beam Installation
General Tools and Materials:
Printable PDF of Suspended Beams Installation Instructions-
 Wood
Beam(s)
Wood
Beam(s)
-
 Wood
Blocking
2”x4” or 2”x6”
(for mounting)
Wood
Blocking
2”x4” or 2”x6”
(for mounting)
-
 Lumber
-
 Mending/
Joining
Plates
Mending/
Joining
Plates
-
 Joist
Hangers
Joist
Hangers
-
 Toggle /
Lag Bolts
Toggle /
Lag Bolts
-
 Wood Cutting
Saw with
Finish Blade
Wood Cutting
Saw with
Finish Blade
-
 1 1/4” Deck
Screws
1 1/4” Deck
Screws
-
 Hand Saw
with Finish
Blade
Hand Saw
with Finish
Blade
-
 Caulk Gun
-
 Loctite® PL® Premium® 3X Construction Adhesive
-
 Color Complimenting Textured Caulk
-
 Screw Gun /
Drill Driver
& Bits
Screw Gun /
Drill Driver
& Bits
-
 Level/Laser
-
 Tape Measure
-
 Square/T-Bevel
-
 Straight Edge
-
 Stud Finder
-
 Utility Knife
-
 Touchup Kit
-
 Small
Paint Brush
Small
Paint Brush
-
 Painters
Tape
Painters
Tape
-
 Pencil
-
 Ladder
-
 Clean Cloth
-
 Safety
Glasses
Safety
Glasses
- Acclimate all beams by storing them flat in the installation location (but away from moisture and direct sunlight or other heat sources) for at least 24 hours.

- Be sure to obey all safety rules and recommendations set forth by tool manufacturers.
- Always comply with clearances set forth by the manufacturer of stoves, fireplaces, furnaces, and any other heat source.
- Wear safety glasses during the entire installation process.
- Our products may have screws embedded below the surface. We recommend using a hand saw (not power tools) when cutting these products. You may choose to locate screws with a stud finder. AZ Faux is not responsible for any bodily harm or damage to your equipment if power tools are used.

- Ensure surface is structurally sound and in good condition. Surfaces such as drywall should be flat and smooth to minimize gaps.
- Gather all tools and materials.
- Inspect Beams:
- If the beam(s) shipped in more than once piece, there will be markings inside the beams that indicate intended fit.
- If the beam(s) have a lap or scarf joint, be sure to mount the top section first.

Click Here for Care and Maintenance info.
Directions

Step 1
Lay Out the Installation
Tools:
- Square/T-bevel
- Pencil
- Stud-Finder
Establish where to install the beam and determine if there are studs in the location.
If the ceiling is vaulted, determine the angle of the ceiling using a square or T-bevel.
Step 2
Determine Installation Span
Tools:
- Tape Measure
- Ladder
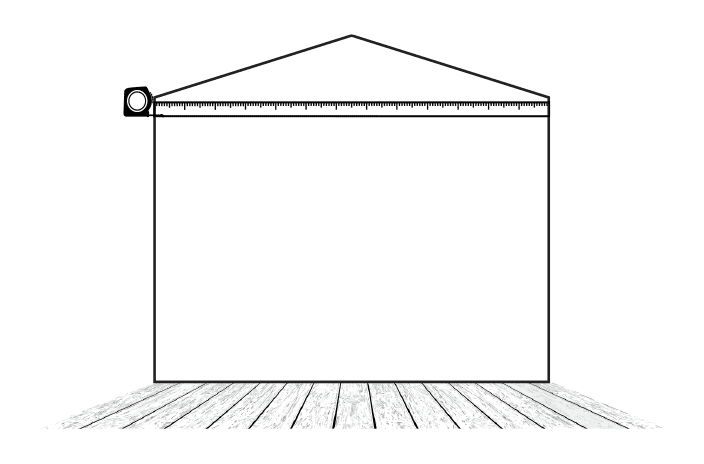
Measure the length of the ceiling at the point where the beam is being installed.
Step 3
Create Support Beam
Tools:
- Mending/Joining Plates
- 2 x 4 Lumber
- Screw Gun/Drill Driver
- Wood Saw
- Deck Screws
- Square/T-bevel
Create the support beam by either cutting lumber down or joining equal lengths of lumber with mending/ joining plates to create a single beam that spans the installation.
Step 4
Determine Number of Mounting Blocks
Tools:
- Tape Measure
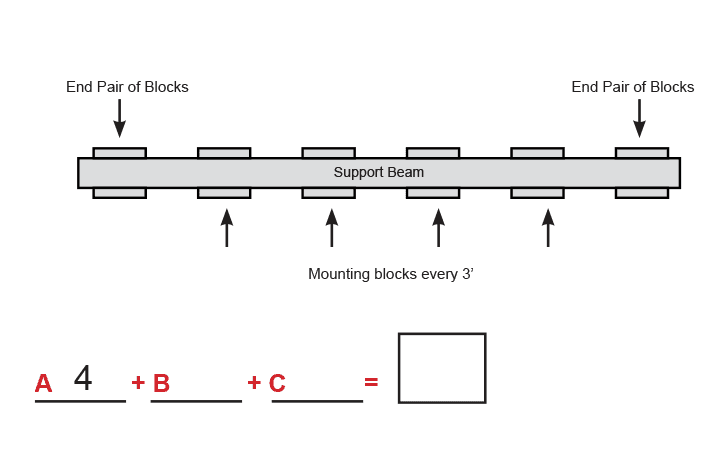
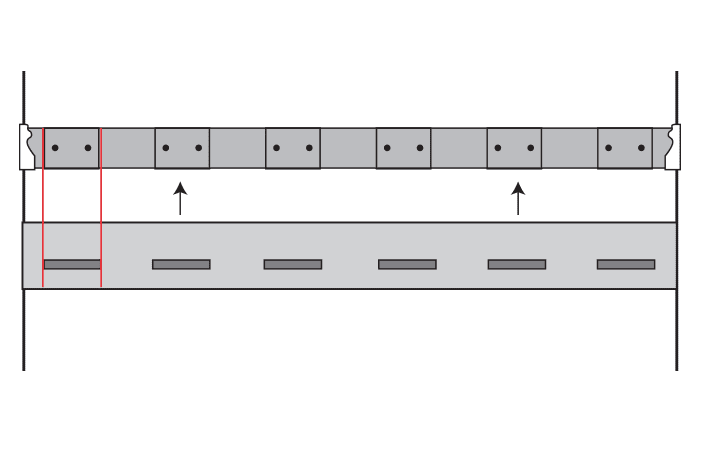
Mounting blocks will need to be added in pairs along either side of the support beam. Determine the number of blocks:
- A pair of blocks at each end of the beam A
- A pair at least every three feet along the beam. B
- If using more than (1) decorative beam in a run, 2 pairs of mounting blocks must be used at the joint where the decorative beams meet. C

Step 5
Measure the Mounting Blocks
Tools:
- Tape Measure
- Measure the inside width of the decorative beam.
- Measure the width of the support beam; add 1⁄8”
- Subtract the support beam measurement from the beam inside width.
- Divide that number in half to determine the thickness of the mounting blocks.

Step 6
Cut Blocks and Create Support Structure
Tools:
- Lumber
- Wood Saw
- Tape Measure
- Screw Gun/Drill Driver
- Deck Screws
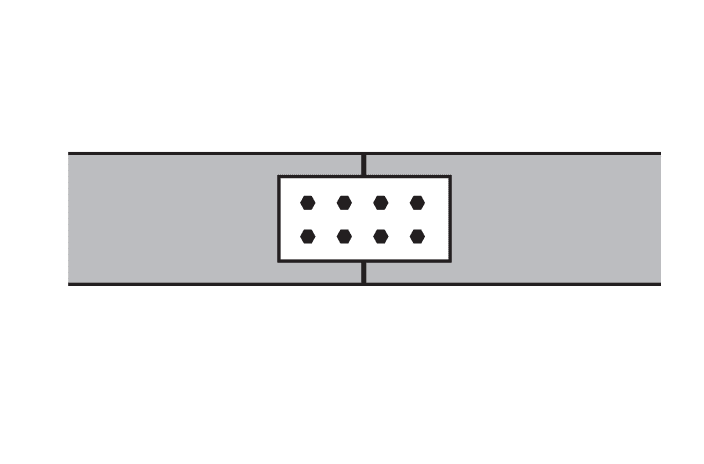
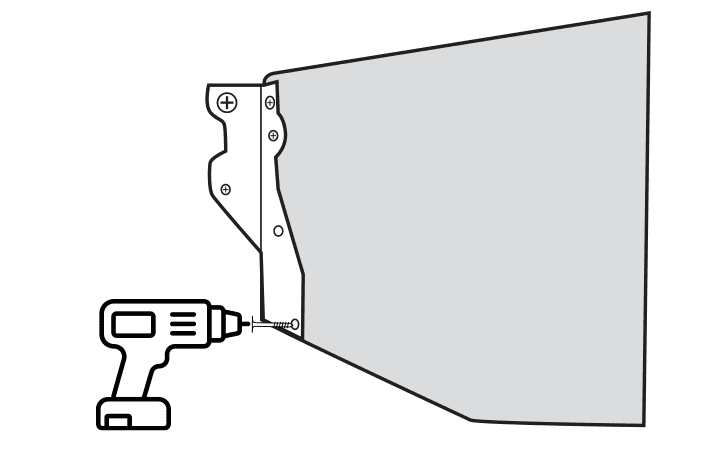
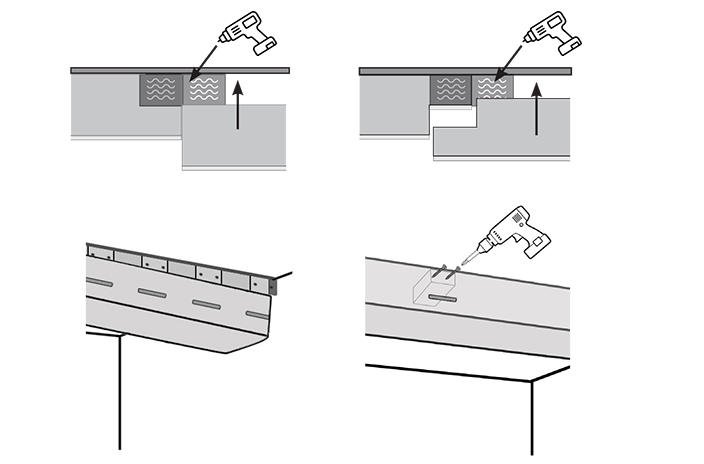
- Based on the calculation of E in Step 5, cut the appropriate number of mounting blocks determined in Step 4.
- Drill (2) pilot holes in each block.
- Screw the mounting blocks to the support beam. Attach a pair of blocks at each end (leaving only enough room to attach the joist hangers).
- Attach pairs of mounting blocks every three feet along the beam to create the support structure.
- If joining more than (1) beam ensure that there are 2 pairs of mounting blocks at the point where the beams will meet and that the blocks project 2 to 3 inches on both sides of the joint.

Step 7
Fit the Support Structure to the Decorative Beam
Tools:
- Joist Hangers
- Screw Gun
- Level/Laser
- Toggle Bolts
- Deck Screws
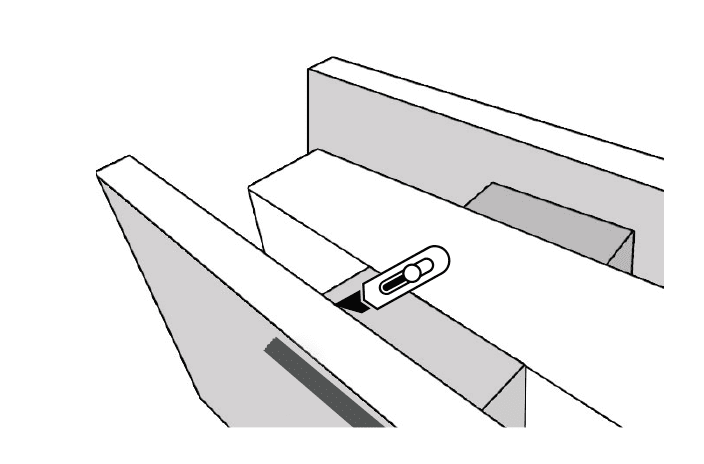
Lift support structure to the mounting position to ensure fit. Make adjustments, if necessary. Mark the locations for the joist hangers. Mount the joist hangers.
Step 8
Make Adjustments to the Support Structure
Tools:
- Painters
- Utility Knife
- Set the support structure inside the decorative beam. Ideally you want about 1⁄8” clearance on each side between the support structure and the inside of the beam. Make any necessary adjustments.
- With the support structure inside the decorative beam, mark the sides of the beam with painters tape to indicate the location of the mounting blocks.
Step 9
Trim the Decorative
Tools:
- Tape Measure
- Utility Knife
- Wood Saw
- Square/T-bevel
- Painters Tape
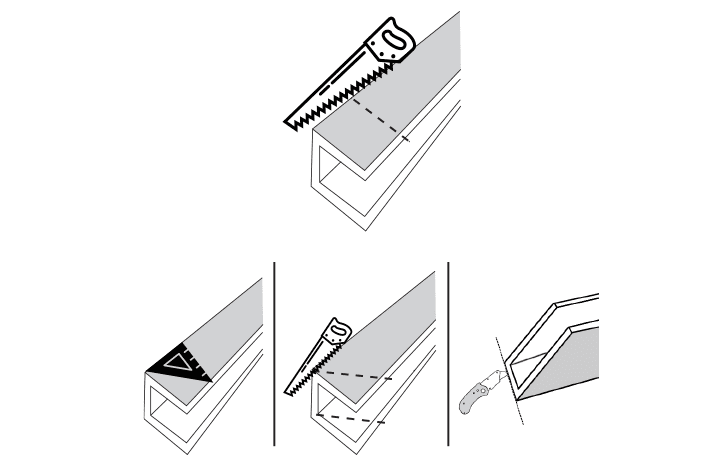
- If the walls are straight, trim the decorative beam to length based on the measurement from Step 2. It is best to cut the beam slightly long (about 1⁄8”) to ensure a tight fit. (Figure A)
- If the ceiling is vaulted, use a square/T-bevel to transfer the angle of the ceiling onto the beam, then score and cut the beam. (Figure B)
- Raise the beam onto the support structure. Check that both ends are flush with the wall/ceiling. Adjust as needed.
- Wipe the support structure and the inside of the beam with the tack cloth to remove debris.
Step 10
Mount the Support Structure
Tools:
- Screw Gun
- Screws
Place the support structure in the joist hangers and secure with screws.
Step 11
Dry Fit the Beam
- Raise the beam onto the support structure. Check that both ends are flush with the wall/ceiling. Adjust as needed.
- Wipe the support structure and the inside of the beam with the tack cloth to remove debris.
Step 12
Apply Adhesive
Tools:
- Caulk Gun
- Adhesive
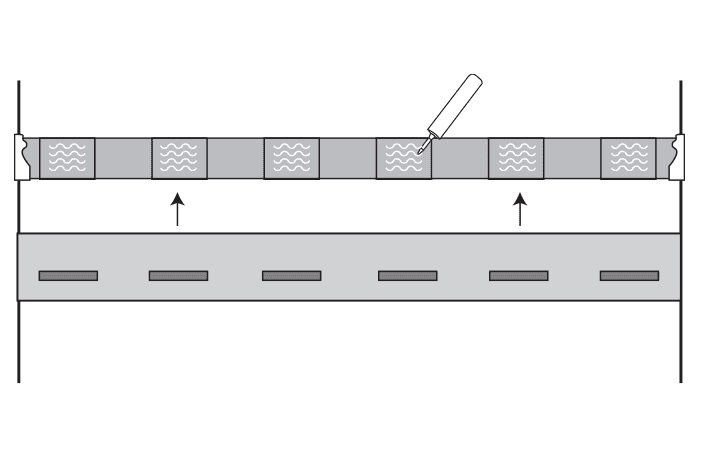
Apply adhesive to the sides and bottom of the mounting blocks.
Step 13
Install the Beam
Tools:
- Screw Gun
- Driver Bits
- Deck Screws
- Slide beam in place over the support structure.
- Slightly countersink (4) screws, (2) per side, through the beam at each mounting block.
- If your beam is in more than 1 section be sure to secure each section with at least (4) screws, (2) per side. If it has a lap or scarf joint, be sure to install the top section first.
- Remove painters tape.

Step 14
Install 4th Side (Optional)
If you purchased a 4-sided beam, add the 4th side to the installation by covering the exposed support structure with the 4th side plank. Secure it with adhesive or finish nails.
Step 15
Touch-Up
Tools:
- Caulk
- Caulk Gun
- Touch-Up Kit
- Small Paint Brush
- Painters Tape
- Clean Cloth
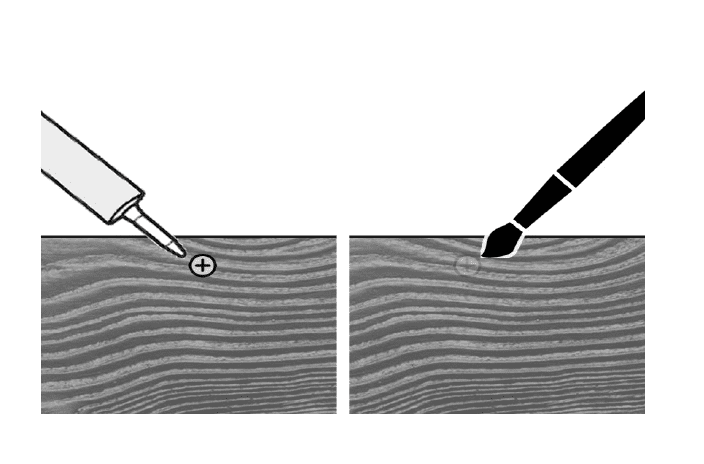
- Apply color complimenting textured caulk to fill screw holes. Blend caulk into adjacent surfaces while it is still wet.
- Where necessary, apply caulk to joints and gaps.
- Use paint from the touch-up kit to paint over the caulk.